
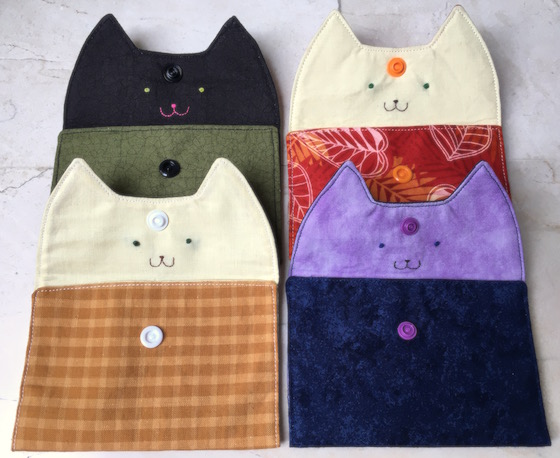

Fancy making these easy little pouches with cat faces? Keep reading!
One of the purchases of this summer it’s been this kit to apply plastic snaps.

I needed them to make some baby bibs I’ll show you soon, but the kit came with 110 plastic pieces… so I kind of have snap supplies for the rest of my life! And that means I’ll be making many projects with them! If you too have snaps to use, stayed tuned for future posts!
Today I bring you this easy peasy pouches, perfect for beginners.

I got the inspiration from this fantastic sewing kit I saw on Pinterest some time ago.
Of course my version is simpler and more versatile, and a perfect project to use your fabric scraps.
You’ll need:
- Outer fabric
- Inner fabric
- Iron-in interfacing
- Basic sewing supplies
- Plastic snaps (You can also change it for velcro, sew in metallic snaps, a button, etc.)
Start by downloading the CAT PATTERN HERE and print it to 100% of it’s size. I’ve written the measurements on it so you can check you have it correctly, or in case you want to draw it directly on cardboard or something.
You’ll need to trace it 3 times; 1 in the interfacing, one in the outer fabric and 1 in the inner fabric
The pattern is the size for the interfacing. Make sure to leave a 5mm sewing allowance when cuting the fabric! Yo can use a patchwork ruler for this purpose, or any other method you prefer.


Iron in the interfacing into one of the fabrics. In this case, I chose he inner fabric, because it’s a lighter color and I didn’t want the dark thread I’ll use for the eyes to show beneath, as it happened here:

(Someone needs his beauty sleep…)
TIP: you can also put interfacing in BOTH fabrics if you feel they are too flimsy or you need extra sturdiness. I did this in the last 2 pouches I made: red/yellow and green/black. Can you tell the difference in the way they look compared to the other two?
Time to make the face.

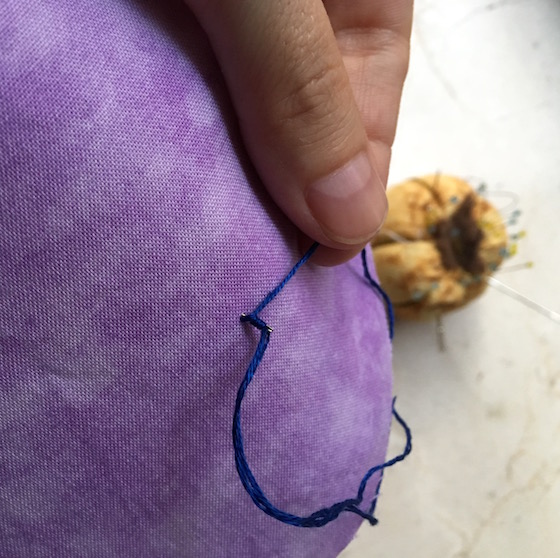
You can punch a hole in the pattern and mark with a pencil where the eyes and nose should be. For the eyes, I used some cross stitch thread and made a french knot. (Click here for a quick video if you don’t know what I’m talking about)
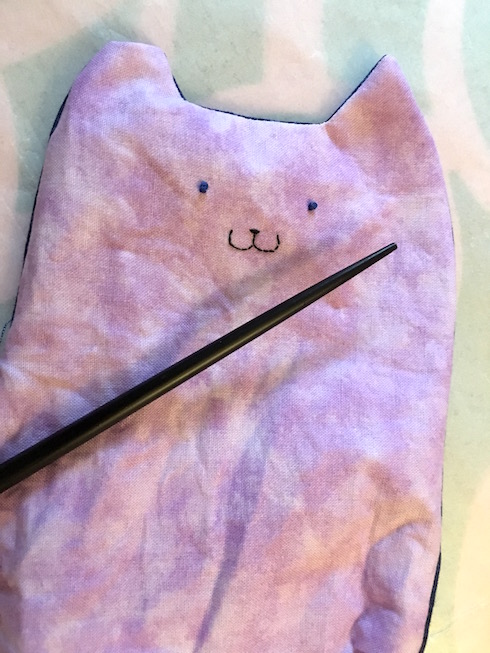
For the snout, just feel free. I used the basic back stitch.

Cute!
Now just pin the two sides together, RIGHT SIDES FACING, and sew along the interfacing.

Make sure to leave a gap in one side so you can flip the whole thing inside out. Make the gap bigger if you are putting in terracing in both sides, since being more rigid will also mean it will be harder to turn.
Trim a little bit the excess fabric in the tip of the ears and the point where the ears meet the forefront. This will make it look better when you turn it.

Pull the interior through the hole and use the magic tool -i.e. Chinese chopstick- to sharpen the corners.
Topstitch all around. (Be less lazy than me and iron it first…)

Fold the body to form the pouch. You can use the pattern as a guide.

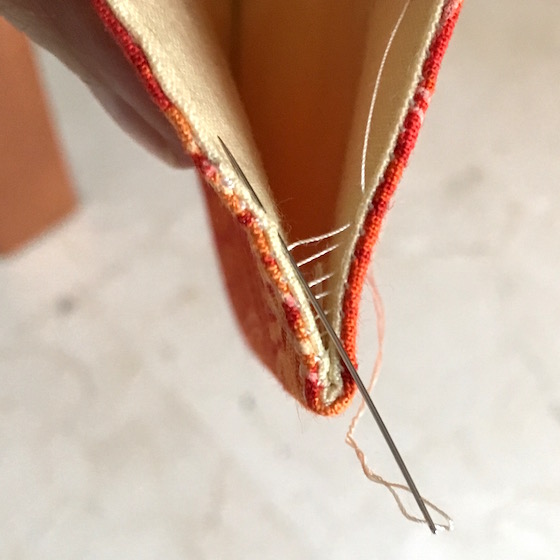
Now, if your sewing machine is powerful enough, you can just topstitch again on each side. If your machine is like mine and doesn’t deal well with too many layers of fabric, just close the sides with an invisible ladder stitch. (Click HERE if you need a video tutorial)
Now you only need to add the snap! Follow the instructions of the manufacturer and there’s no possible error. It’s really really easy to apply. I used the T5 size snaps, except for the purple one, which is a T3. But it doesn’t “snap” as good as the T5, so I think I prefer the bigger ones.

Now they are ready to be filled with anything you want and guaranteed to put a smile on your face anytime you open them! 🙂


These are so cute! I’m definately going to make one. Thanks for the pattern!
Saskia
Hi Saskia! Thanks to you for your kind comment 🙂
Super cute…. Thank you for the pattern and instructions…. I have added this to the top of my list of projects to make.. Can you please tell me where you purchased your plastic snaps kit?
Hi Theresa,
lots of thanks for your kind words.
I bought the snaps from this website: http://snapclic.es/es/ because they ship from Spain. But I’ve been told they are having a problem with the KAM pliers supplier and they are currently sending a different plier that, in my opinion, doesn’t work so well. Since I’m a little bit obsessive, I did some research on the best brands for the pliers before I bought them, and I found out many people agreed it is KAM. One option is to buy directly from the KAM snaps webpage: https://kamsnaps.com
Also in Amazon, if you search for “KAM Snaps plier kit”, you’ll find plenty of options.
Another good brand in PRYM: https://www.prym.com/en/
I hope this helps!
Thanks!
Thank you so much for the information on the KAM snaps. I have purchased a kit like you have pictured. I also have baby bibs to make and the snaps will be much better than Velcro. So glad I happened to find your site. Thank you again for your ideas and valued help. I’m in appreciation!!
Theresa
Just seen these cuties. Love them and going to make some. Thank you for the pattern.
Thanks for your kind comment, Janis. :-*
This is super adorable! I’d love to make one with a fuzzy or velvety fabric. First I need to improve my sewing skills.
Pingback: Maak met me mee maandag 2 | Atelier Aolt
These are adorable! My granddaughter would love them! Once I learn how to make them I would also like to teach her! Thank you for this amazing tutorial! ❤
Thank you very much for stoping by my blog and for your comment. I’m sure yours will be very pretty too.
Pingback: 24 Cat-Approved Room Ideas For Your Kitty-Themed Home - Vandar.info
Pingback: Best Sewing Projects Round up: Pouches & Bags | Bubanana
Köszönöm szépen az ötletet és a szabásmintát is.
Nagyon édes! 🙂
Boa tarde gosto muito do seu trabalho mais gostaria das medidas desta do gatinho ☺️ obrigada Deus abençoe 🙏
Olá Maria,
Muito obrigada por lo comentário. 💜 Pode encontrar o pattern com as medidas no post, fazendo click en “CAT PATTERN HERE”.
M’encanta! Gràcies.
I just love this idea and can not wait to sew this pattern for my neice! Thank you for the pattern.
I’m glad you like it! Thanks a lot of stopping by and for your comment 🙂
Those cat pouches are so cute! Where can I get the pattern?
Hi there! Thanks for your comment. You’ll find the pattern if you click where ir says CAT PATTERN HERE 😉 Thanks!
Cute!
Pingback: Little Feline Pouches Free Sewing Pattern
Pingback: New cat pouches | Bubanana